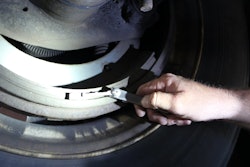
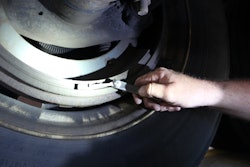
As a part of most routine maintenance inspections, the tractor’s suspension system is examined to make sure it is in good working order. Unfortunately, that same level of attention is not always paid to the trailer suspension. According to ArvinMeritor, trailers and trailer components are not maintenance-free. Like most every component or system, trailer suspensions need to be checked and maintained on a regular basis in order to ensure proper function.
Taking a systematic approach to trailer suspension maintenance can help ensure that your customer’s vehicle won’t be placed out of service following a Department of Transportation roadside inspection.
One of the first things you will want to do is look at the trailer to make sure it is level. Check to ensure that all welds are of good quality, all bolts are in place and secure, the pivot connection is secured properly and that there is no component interference, according to Hendrickson.
Remind your customers to check clearance around air springs, tires, shock absorbers and other moving parts every 30 days. They also should make sure bolts are secure and axle connections are tight. In addition, they should be on the lookout for any signs of wear. You also should perform these inspections whenever the trailer is in your shop for service.
At 90 days, in addition to what is inspected at the 30-day interval, look at welded connections for signs of deterioration, and check frame attachment joints, cross member structures and all pivoting and clamping connections.
ArvinMeritor recommends the following be performed annually:
- Visually inspect all fasteners for looseness or movement. Make sure that loose fasteners have not caused damage to any other suspension components. Tighten loose fasteners to the correct torque specification.
- Replace any damaged components and fasteners.
- Inspect the upper control arm bushings for ragged or loose pieces that protrude from the pivot connection area. If bushings are ragged or have loose pieces, replace them.
According to Hendrickson, in order to ensure that your customers realize all the benefits of air ride suspensions – smoother ride, minimized cargo damage, load equalization and flexibility to haul a variety of freight – they must be maintained at the proper ride height.
Ride height is the distance from the suspension’s mounting surface to the center of the axle, according to Hendrickson. Measure ride height on the axle with the height control valve. You can either use a ride height gauge or a tape measure to find a trailer suspension’s ride height.
Add half of the axle diameter to the measurement to determine the suspension’s ride height. Next compare the measured ride height to the designed ride height, which can be found on the suspension’s identification tag. The measured ride height should be the same as the designed ride height.
“A ride height that measures lower than the desired ride height must be raised, while a ride height that measures higher than the designed ride height must be lowered,” according to Hendrickson.
Use the following procedure to adjust the suspension’s ride height if it is not the same as the designed ride height:
- Disconnect the height control valve linkage.
- Push the height control valve arm up to raise the ride height (add air to the air springs) or down to lower the ride height (remove air from the air springs) until the distance between the suspension mounting surface and the center of the axle equals the designed ride height.
- When the suspension is at the proper ride height, position the height control valve arm in the neutral position.
- Connect the height control valve linkage to the control arm. You may need to adjust the linkage length so the control arm is held in the neutral position when the suspension is at its designed ride height, Hendrickson says.
According to Hendrickson, there must be a minimum pressure of 80 psi in the air reservoir in order to open the brake protection valve and allow air to flow through the height control valve.
The height control valve itself and its linkage need to be inspected on a regular basis for proper clearance, operation and adjustment, according to SAF Holland. Dirt or foreign particles in the air line may harm the internal workings of the valve.
SAF Holland says that even though the valve contains a protective filter to eliminate foreign matter, you should employ normal air brake system maintenance procedures and drain moisture from air tanks periodically.
SAF Holland recommends using the following procedure for checking height control valve performance:
- Apply air system pressure in excess of 85 psig.
- Disconnect the lower connection of the link assembly from the mounting bracket.
- Move the control arm up to 20 degrees for 10 to 15 seconds. Air should flow to the air springs.
- Move the control arm to the center (neutral) position, which should shut off the air flow.
- Move the control arm down 20 degrees for 10 to 15 seconds. Air should exhaust.
- Move the control arm to the center (neutral) position. The valve should shut off air flow.
- Reconnect the lower link assembly to the mounting bracket, and torque to 30- to 40- in.-lbs.
If the valve does not perform correctly, it needs to be replaced.In addition, the height control valve linkage needs to be checked for proper length and assembly.
Use this procedure recommended by SAF Holland:
- With the suspension set at the proper ride height, determine the length of link assembly required by measuring the distance from the center line of the height control valve arm hole to the center line of the lower connection bracket hole.
- Determine the length of rod required by subtracting 1-3⁄8 inch from the required assembly length.
- If a new rod link is required, cut the rod to the desired length and remove any sharp edges.
- Assemble clamps, link ends and rods. Insert the rod into the link end with an equal distance from both ends. Make sure the link ends are aligned to each other.
- When the link ends are aligned properly and the link assembly is at the required length, tighten the clamps.
- Install the link assembly.
The slider needs to be inspected for loose, broken or missing fasteners, which can cause loss of vehicle control, according to ArvinMeritor.
Check the slider locking pins and wear pads for signs of excessive wear or binding. Inspect the structure of the slider box and cross members for damage. Inspect the front and rear hold down clips to ensure they are secured correctly around the body rails. By inspecting the various components of a trailer suspension, you can help keep your customers on the road.


