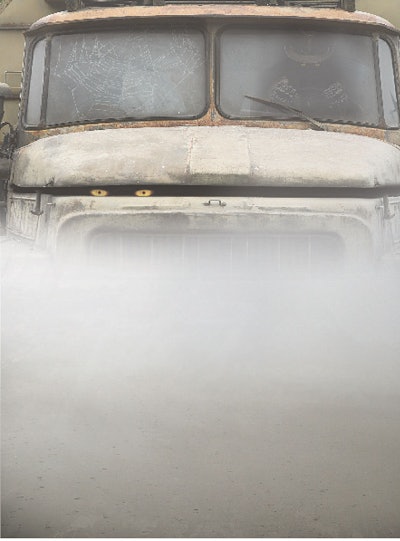
Most technicians want to do a good job, but even the best technician can lose focus, try to cut corners or just have a bad day. Other times even the best intentions are no match for outside forces or missing information.
We’ve reached out to the industry to collect repair horror stories to use as a way to reinforce important lessons.
The following tales from repair garages, manufacturers and suppliers should not be interpreted to imply a shop is bad, or that a particular manufacturer or supplier makes shoddy parts Instead, we hope to illustrate problems that can occur in any shop or with any part.
In fact, we thank the brave souls who conquered their demons and shared their terrifying tales with us so that we could pass them on to you.
The Perilous Path
Sometimes having the right authorizations or tracing a problem back to the original source can save your shop from a disastrous outcome.
Porretta’s Truck Services took delivery of a 2009 Freightliner with frame-related damage that was towed in following an accident. According to Tony Porretta, the truck was a rental from a major truck rental company and the customer was going to pay the bill.
After looking over the truck, his shop felt there were two repair options: straighten one frame rail and replace the cracked one or straighten both rails, weld the crack and sleeve both rails.
Even the best technician can have a bad day, and sometimes outside forces overcome the best intentions.
“Since the vehicle had less than 100,000 miles on it, my recommendation was to straighten the one rail and replace the other, because if we sleeved the rail it would lower the value of the truck later,” Porretta says.
He provided the customer with estimates for both procedures to turn into the rental company for review and authorization.
The customer called back saying the rental company had authorized the cheaper of the repairs, which was to sleeve the rails.
Once the work was completed, the truck rental company came to inspect it. According to Porretta, “That’s when the nightmare started.”
The rental company said the repair was unacceptable and added that it had not authorized such a repair — even though the customer told Porretta it had.
The truck rental company said it now wanted both rails replaced because of the additional holes drilled on the uncracked rail from the sleeving process.
“The repair turned ugly because this customer now had to pay for two frame rails,” he says. “The whole event almost came down to a meltdown between all three parties.”
Because the rental company was a good customer, Poretta agreed to absorb the cost of the first repair in order to resolve the issue and keep the truck rental company as a customer.
“The lesson learned is to always have written and signed documents from the owner of the vehicle and only take the owner’s word about what to do.”
He adds, “I learned that you have to maintain a paper trail and signed authorizations from the start of the job to the finish, along with photographs.”
A phantom vibration problem confronted the technicians at Botts Welding & Truck Service. A 15-month old tractor was brought to Botts after multiple trips to a dealership, which was unable to fix the problem.
The first thing Botts’ technicians did was road test the truck. “All indications pointed to the rear of the tractor so we removed all the tires and checked for proper inflation, tread pattern, diameter and determined that they had been mounted on the wheels properly,” says Gordon Botts, owner, Botts Welding & Truck Service.
All assemblies were found to be in tolerance and brake drums also were in tolerance and roundness.
Axle shafts were removed and checked for straightness and balance. This was followed by checking wheel bearing end play and torque. Again everything was in order.
Next Botts checked angularity of the driveshaft to make sure the differential matched the transmission angle.
“The next step was to check the frame for frame hop. Technicians set up wireless vibration sensors on the frame rail and drove the truck on the highway with a laptop in the tractor,” Botts says.
“The computer displayed a weird graph pattern indicating a ‘hog and sag,’ more like a banana,” he says.
This lead his technicians to conclude there was a frame flex problem, although that diagnosis did not make sense since it was a new truck that had never been overloaded or in an accident.
At that point, Botts decided to contact an engineer at the manufacturer of the axle and differential. He suggested there was a problem with the differentials so Botts removed the rear differential and checked the wear pattern. He discovered that the ring and pinion had a very unusual pattern.
He again contacted the engineer who suggested replacing the unit. Since Botts’ is not authorized to perform warranty work, he contacted the dealer’s service department, but was told unless the work was done in the dealership’s shop it would not be covered under warranty.
The customer did not want the vehicle to go back to the dealership so Botts sent the carrier to a rebuilder. The rebuilder inspected the unit and put it on a dynamometer where the carrier exhibited a bad shake.
“We purchased a rebuilt differential that came from the OEM and carried a two-year warranty,” Botts says. Thinking they had solved the problem, Botts installed the new carrier, took the truck for a test drive only to find the vibration still was occurring.
Another call was made to the engineer who this time suggested checking the front differential. The unit was removed and sent to the rebuilder who discovered the same unusual wear pattern.
“We made the decision to have the front unit exchanged and installed on the truck,” Botts says.
When entering the information on the work order, Botts’ office manager discovered that the rebuilder had billed the company for two different gear ratios. Botts immediately called the rebuilder to find out about the discrepancy. The rebuilder told him the carriers he had sent in had had different gear ratios.
At that point, Botts again removed the front carrier, installed a differential that had the same ratio as the rear end and the vibration was gone.
But alas, the problem was not over. The truck owner refused to pay for the repairs because he felt they should have been covered under warranty. The dealer ended up repossessing the truck because the owner had stopped making payments because he had not been able to use the truck.
Botts is suing both the dealer and the truck manufacturer, but since the truck owner filed for bankruptcy Botts has no recourse with him. The dealer and the manufacturer are claiming they did not authorize the repairs and so are not liable for them.
Botts believes the problem could have been resolved much faster if the dealer had reported the problem to the truck manufacturer who then could have called the differential manufacturer.
“The manufacturer would have taken care of the cost since it was their error,” he says. Differential sets are provided to the truck manufacturer as a set. “They clearly mismatched them when they were sent to the truck manufacturer.”
Botts says he paid for a valuable lesson and next time will be more diligent about making sure all the parties involved do what they are supposed to do before he undertakes a repair on a vehicle that is still under warranty.
Vanishing Parts
This next scary tale comes from Barry Ernst of Frame Service. This problem occurred on an AG 100 Kenworth air ride.
“We had two trucks within a few months with this problem,” Ernst says. The problem was causing the housing to shift back and forth.
Ernst says his technicians had worked on other trucks with that same suspension and had not had a problem. On the problem trucks, Frame Service’s technicians would replace the bolts but within a few weeks they would come loose.
 An improperly installed flywheel can cause the release bearing to stick in the released position due to excessive run out.
Looking at another AG 100 suspension that his shop had worked on, Ernst discovered on this truck he had to correct the thrust and scrub on all four straddle mounting bushing, whereas on the problem trucks he had not needed to correct all four bushing.
To solve the problem, technicians installed an equal number of washers on both sides of the housing so as not to change the thrust.
“The problem went away,” Ernst says. “Now our procedure for this suspension is to install at least one washer between the housing bracket and straddle mounting bushing. We have no more bolts coming loose.”
Chilling Changeovers
Technician changeovers provide ample opportunity for mistakes to occur. Jason Dunn, customer support supervisor for Eaton Corp., recalls an incident that occurred when he was a Roadranger territory service manager.
A local repair shop had installed a new Solo clutch on a Hino chassis and in post-repair testing discovered that when they depressed the clutch pedal to the floor to release the clutch, the clutch pedal would stick.
Dunn had never encountered a problem like this so he agreed to go to the shop and help the technician install a new clutch.
“I got under the truck just as they were bolting the clutch up,” Dunn says. “Next they tried to install the transmission but were having a hard time aligning the transmission input shaft to the pilot bearing.”

Again the technician pressed the clutch pedal and again it stuck. Dunn suggested once again removing the transmission and the clutch and starting the repair over this time following all of the Roadranger installation procedures.
The first step is so use a dial indicator to check flywheel runout to determine if it is within specification. During this process, Dunn noticed some of the flywheel bolts were loose, and thought that might be part of the problem. But then he started checking runout and discovered that the flywheel runout was out of spec.
After removing the flywheel, Dunn noticed an indexing point on the crankshaft, which meant the flywheel could only be put on one way.
“In this particular instance, the technician had put the flywheel on the wrong way and in the process knocked the bolts loose,” Dunn says. The flywheel was not flush with the crankshaft and that was causing the problem with the clutch pedal.
Once the flywheel was installed properly, the clutch pedal worked fine.
“Many issues occur at shift changeover especially if the technicians do not communicate,” Dunn says. In this case, the second-shift technician assumed that the flywheel had been put on properly, which it hadn’t been.”
The other lesson from this tale is that had the technicians followed the official installation procedure and checked the flywheel runout, the problem would have been caught immediately.
Repairs also can go awry when a technician leaves the bay to get a part and fails to pick up exactly where he left off when returning to the repair.
A truck came into a dealership’s service bay with a leaking wheel seal. The technician pulled off the wheel hub assembly, cleaned everything, put the brake shoes back on, put on a new wheel seal and filled up the cavity. He installed the inner nut but left the bay without installing the outer lock nut.
Another tech came in to complete the job and installed the axle shaft but failed to check to see if the outer lock nut was on.
“As the truck started going down the road, the vibration caused the wheel axle to work itself loose,” an anonymous storyteller says.
The inner nut came off the truck, and as the truck was going down the road at 60 mph the wheel came off and shot down into a field. Fortunately, in this case, no one was injured.
The problem could have been prevented if the first technician had remained in the bay for about one additional minute.
“When you put the inner nut on and torque it down, it only takes an additional minute to put the outer lock nut on and torque it,” our anonymous source says.
“He never should have walked away from the job without locking both of those nuts down.” And the second technician should have taken a minute to check the work that already had been done to make sure it was done properly.
Frightful Rookie Repairs
Sometimes inexperience plays a starring role in a poor quality repair. One shop manager shared the following tale.
A young technician had pulled a wheel and hub assembly off a vehicle to install a new wheel seal. Once he had replaced the seal, he torqued everything, but failed to check the lube level in the differential.
It is important in this type of repair to pre-fill the cavity with oil so the bearings get lubricated.
As a result of the technician’s failure to check the lube level, the bearing burned up and the wheel end caught on fire.
Clearly this rookie tech needed a bit more training.
Brian Mulshine, director of field service at Navistar, shares a tale of a mistake a tech will only make once. A young technician came to the service manager in a panic because the engine of a vehicle he just finished working on would not stop running.
It seems the technician had been working on replacing a failed turbocharger. What he failed to realize is that when a turbo fails the oil that is pumping through it to cool the bearings is sucked into the charge air cooler where it pools on the bottom.
“When an inexperience tech puts in a new turbocharger he may not think to clean out the whole air induction system and it could have several quarts of oil in it,” Mulshine says.
What happens is when the tech turns the truck back on after the repair, the oil that has collected in the charge air cooler heats up and turns into a vapor, which will become fuel and the engine will just take off.
“The technician will think there is some ghost or phantom problem that is causing the engine to run away, when in fact it was his failure to remove oil from the charge air cooler,” says Mulshine.
Phantom Knowledge
Sometimes arrogance can be a technician’s worst enemy. At one point in his career, Dunn was a training specialist for Oshkosh Corp. As part of his technician training program, he would cause electrical failures on trucks and ask technicians to find the source of the failure.
“We would give the technicians everything they needed: digital volt-ohmmeters, electrical schematics and troubleshooting guides,” he says. “Inevitably they would head to the shop with only the volt-ohmmeter and start poking around.”
When Dunn would see technicians doing this, he would ask them what they were doing. When they explained they were checking the resistance on the circuit, Dunn would then ask them what the specification was.
He often was met with blank stares to which he would reply, “If you don’t know what the specification should be, once you find what it is on this circuit how will you know if it is good or bad?”
This usually would send the technician scrambling back for the troubleshooting guide and electrical schematic.
“I don’t know if it is arrogance, but there is a feeling among technicians that if you have to read the manual to complete a repair, then you don’t know what you are doing, or you are not seasoned enough to be able to fix it the right way,” Dunn says. “That is so far from the truth,” he adds.
He believes that today’s vehicles are too complex for that sort of thinking.
Dunn’s advice to technicians can be summed up in an acronym he learned a long time ago: RTFM, read the factory manual.
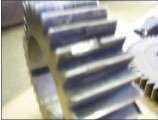 Damage to the teeth of this crankshaft gear occurred during a repair that went from bad to worse.
“This is especially true for electrical components where specifications are so vital in addition to being difficult to troubleshoot,” he says.
“Troubleshooting an air system is a little easier because air makes noise, it leaks. When you troubleshoot a hydraulic circuit or an oil circuit it is a bit easier because fluid can leak.
“But you can’t see electrons and you won’t see them spilling to the ground, which is why most people have the most difficult time troubleshooting electrical circuits and why they need to RTFM.”
Cheap Thrills
A failure to use a $15 strap kit led to a major repair. A truck was in a shop for repair, and over the course of the repair, the U-joint was removed from the driveshaft. The shop had a policy of replacing the strap kit every time this happened.
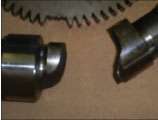 Additional damage occurred to the cam gear and the camshaft, which broke into two pieces.
However, a technician failed to follow this procedure and used the old strap kit and bolts. “Everything was covered in grease,” says our anonymous storyteller. “There was grease in the bolt hole and the strap kit did not go all the way tight.”
As the truck was going down the road following the repair, the cap came loose and the driveshaft fell out of the truck.
“When a driveshaft comes out of a truck it is as like a grenade going off underneath the truck. It bangs, it clangs, it rips air lines, it rips air valves, it dents metal. It basically twists metal up like a pretzel,” the source says.
As a result, the shop now had a major repair on its hands. “New air lines and new electrical lines had to be installed and the cross members had to be replaced. And to think a $15 strap kit could have prevented it all.”
The Repair From Hades
Sometimes things just seem to go from bad to worse as was the case with this horror story from R & W Truck Service. A diesel powered vehicle that was not running properly was brought in the shop.
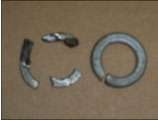 The lock nut washer on the left was found to have caused much of the damage to the gear teeth. It should have looked like the one on the right.
After a careful diagnosis, the technician determined that the injection pump and injectors needed to be serviced. The repair was made and after a successful test drive, the vehicle was returned to the customer.
On its first trip following the repair, the truck had to be towed back to the shop. This time the diagnosis showed bent push rods and a broken rocker.
The repair was made, but once the truck was restarted, Christopher Schutt, R & W president, says it did not sound right. “We disassembled the engine and found the same push rods were bent.”
Schutt’s technicians dug deeper looking behind the front timing gear cover and discovered broken gear teeth caused by metal pieces.
On further examination, they discovered that the metal pieces were from a lock washer off the recently installed injection pump.
Sounds like an easy repair. Change the camshaft and crankshaft gears and replace the lock washer. However the cam gear is attached to the camshaft, which broke and became a two-piece unit. And the crankshaft gear had rotated one-eighth of a turn.
“Now we are three weeks into the repair, tracking parts down and trying to maintain good relations with our customer,” Schutt says. Once the necessary parts arrived, Schutt’s crew worked hard to get the truck back on the road again.
Three hours after the customer took delivery, Schutt got a call telling him the truck’s engine had stopped and the vehicle was being towed back in.
When the truck arrived, Schutt checked some basics again and scanned for codes. He found the cam sensor was setting a fault code, but further diagnosis could not conclusively confirm the fault.
At this point, technicians decided to replace the sensor and the truck then started working properly.
Schutt assumes that the washer got knocked down into the front cover during the disassembly needed to install the new injection pump.
As a result of this unfortunate incident, Schutt has instituted a new method of parts organization during repair jobs. “The likelihood of a mistake is reduced by a little preventive maintenance that shouldn’t stop at the vehicle level. It also should include your staff,” Schutt says.
Keeping The Demons Away
Not all mistakes can be prevented, but there are things shops can do to lessen the chance of ghosts and goblins getting in the way of a proper repair.
Training and Tooling: One of the biggest things a shop owner can do is invest in training and tooling. “It gets really difficult,” says Brian Mulshine, director of field service for Navistar. “I can’t tell you how many different things you need to test the EGR cooler for example. You need special fittings and block-off tools to check the pressure or to diagnose an electrical problem.”
Another easy tip is to check for technical letters. Mulshine says that manufacturers issue technical letters that update existing repair procedures or offer advice on how to handle a specific problem.
Given that most of today’s trucks have multiple computers on them, calibration has become a big issue. Mulshine advises shop owners to have technicians check the calibration of the computers when undertaking a repair.
Measurements: In order to improve your shop’s efficiency, you need to monitor your performance. Most shops will look at gross margin or technician productivity and Mulshine encourages shops to look at time to service. This is the time from when the repair order is created to when the first technicians punches in to begin work on the vehicle.
This is something that is increasingly becoming more important to customers. Of course, you also wil want to track how much time is spent completing the repair, as well as how long it takes for the repair order to be closed once the technician signs off the job.
Parts Availability: One of the main things that holds up a repair is lack of parts. This problem has been exacerbated by all the different engine models now available.
“For each engine we launch, there is around $35,000 in parts inventory,” Mulshine says. This includes things like hoses, pipes, pulleys, filters, etc.
It is estimated that for 25 to 30 percent of trucks needing to be repaired a part will need to be ordered. This is one of the drivers behind the OEMs’ focus on accelerated service.
If the technician can diagnose a truck within two hours of it arriving at the shop, any parts not in stock can be ordered immediately and the repair can begin more quickly.
The Recurring Nightmare
By Lucas Deal, Associate Editor / [email protected]
Fighting a devilish repair can be a frustrating, expensive and exhausting experience, but not all service horror stories come from perplexing or baffling repairs. Sometimes simple and quick repairs can cause drama by becoming repetitive problems.
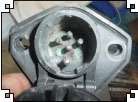 When moisture and corrosive de-icing chemicals seep into a J560 connector, they can eat away and eventually destroy the rods on the connection’s male end.
When a technician finds himself making a normally uncommon repair on a frequent basis, the reason usually is as basic as the repair itself.
The technician just has to find the reason why the failure keeps occurring and when he can’t, a rudimentary repair quickly can become a recurring nightmare.
One area where simple repairs can become tedious and cumbersome is around connectors in a tractor’s electrical system — specifically the connection that routes electricity from a tractor to the trailer to power the latter’s ABS brakes and lighting systems.
The electrical cables that route power to the trailer feature two connection points, both of which are linked together with an SAE J560 connector.
The first connection links the electrical current from the motor to a longer trailer cord that runs under the tractor to a second connection point behind the cab. There the trailer cable is connected to the trailer.
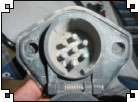 A simple way to minimize corrosion and electrical failure through this connection is regular preventive maintenance and regular greasing.
The connectors perform the same function at each position, but according to Gary Hubbard, quality manager for Phillips Industries, the inconvenient location of the first connection can lead to neglect. That neglect leads to corrosion, which over time creates serious problems.
Hubbard says preventive maintenance will keep the connection working properly for a long time, unfortunately that maintenance is almost never performed. And because it isn’t, he says the connection can haunt technicians for a long time.
“I was corrected by a friend once for saying 95 percent of tractor-side connections rarely get unplugged. That number is actually closer to 99 percent, and may be even higher,” Hubbard says.
“The trailer-side connection, where the trailer is connected to the trailer cable from the tractor, is disconnected and reconnected every time you hook up a new trailer. But where the trailer cable links to the tractor cable under the cab? That is connected and never looked at.”
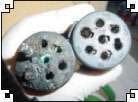 Once a connection has been destroyed by corrosion, the entire link must be replaced. Fixing just one side will cause another round of problems to occur.
That disregard becomes a problem because of an extremely small but problematic space created between the plug and the socket of the connection.
According to Hubbard, J560 connectors have a 14 sq. mm. area of leak space when linked. When moisture and chlorides from road chemicals seep into that space they can combine with the connection’s electrical current to build corrosion. Over time, this corrosion weakens the connection and eventually destroys it, cutting off power to the trailer behind it.
And when it comes to horrific nightmares, a trailer without brakes or lights is right up there.
Hubbard says disconnecting the link periodically to remove moisture and add grease will help prevent a power shortage in most cases. But if one occurs, he says it’s important for technicians to make a complete repair the first time. A stop-gap repair to a J560 connection won’t last — it will just keep coming back to cause problems.
“The problem we see most often in repairs is a technician will find the problem and replace the trailer cable, but he won’t replace the tractor connection into the cable,” Hubbard says. “You have to replace the tractor harness and the trailer cable.”
He adds, “If you just make half the repair then it’s going to fail again that much faster. It’s best to fix everything and then maintain it so it doesn’t happen again.”


