
Phillips says inspecting gladhand seals for damage, such as broken edges, cracks, and wear, is one easy way to protect an air brake system. Gladhands have rubber or polyurethane seals that enable them to seal tightly together when coupled. The seals eventually wear out over time because of the turning action of coupling and uncoupling.
Phillips says it is important to check gladhands for leaks regularly. A leak due to worn seals leads to increased air consumption which weakens the desiccant in the dryer, ultimately resulting in a need for service. Leaks also cause more wear on the air compressor. When leaking seals are replaced immediately, Phillips says it ensures that the air compressor and air dryer desiccant will last longer, resulting in better braking.
The company offers the following as a reference guide for replacing leaking seals:
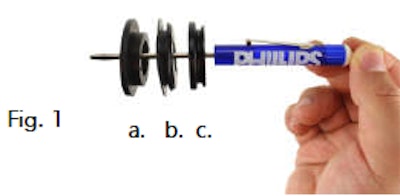
- There are three types of gladhand seals: (a) rubber single lipped, (b) rubber tapered and (c) polyurethane tapered seals. Tapered seals are more popular than single lipped seals. (Fig. 1) All seals are universal, fitting into any gladhand. Polyurethane seals are self-lubricating and typically last longer than rubber. Poly seals are available in black, gray, red, and blue, and are also available with dust flaps or built-in filter screens.
- When using colored seals, put the proper color in each type of gladhand connector. Parking brake lines are red, while the service brakes are blue. Black/gray seals are universal and can be used in either connection.
- Remove the old seal by gently prying it out with a screwdriver. Pay attention not to damage the gladhand surface. (Fig. 2)
- Before installing the new seal, use a clean rag to wipe the gladhand cavity clean. Gently remove any debris if applicable. (Fig. 3)
- To Install the new seal by hand, position half of the seal in the air hole of the gladhand, aligning it squarely with the hole. Then press inward all around the seal’s surface to force the seal to lock into the groove all the way around. (Fig. 4) Rotate the seal several times once it’s in place to make sure it is properly seated. (Fig. 5)
- To avoid leaks in the seals, inspect them at every preventative maintenance interval for damage and replace at least once a year. (Fig. 6)
For more tips from Phillips Industries regarding gladhand maintenance, please CLICK HERE.


