As the intermediary between a driveshaft and transmission, universal joints (also known as U-joints) serve a vital role in vehicle propulsion. A deteriorating universal joint can introduce vibration when in motion, creating driver discomfort and reducing the performance of related, far more expensive components.
Universal joints found on many new medium- and heavy-duty trucks require little maintenance, but that doesn’t make them indestructible. Excessive torque, overloading and improper specifications for the duty cycle are all reasons a universal joint may fail prematurely on a commercial truck.
“A universal joint serves as a connection point for much more expensive components that help make a truck move. In that way, U-joints can occasionally be overlooked,” says Samuel Marco, senior account manager, drivetrain at Cummins-Meritor. “But U-joints are important. They are designed in a way to transmit force to those more expensive components and when they are stressed, that can impact those other components as well.”
[RELATED: How to replace leaf springs]
When replacing a universal joint, experts note the importance of following manufacturer guidance, using proper tools and post-service inspection and lubrication as essential for ensuring a universal joint achieves its maximum life cycle.
Ready service area for repair
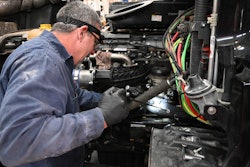
As is the case with all truck service, the first step in replacing a universal joint is safely readying a truck for maintenance. This means removing keys, chocking wheels and, in this case, raising the vehicle slightly and releasing the parking brake so the wheels can rotate freely. Removing a broken or faulty U-joint requires disconnecting at least one end of a driveshaft so the U-joint can be accessed. Cummins-Meritor says releasing the parking brake will enable a technician to spin that driveshaft as necessary to access the parts that hold the U-joint in place.
A stand or separate jack also should be available to hold the weight of the driveshaft once the end yoke is disconnected so the component does not fall on the technician or is damaged by falling on the ground. Additionally, the driveshaft should be visibly marked before removal so the component can be reinstalled in the same place after the U-joint is replaced.

“If you don’t line the splices up perfectly you can introduce vibration into the driveshaft,” says Matthew Linko, senior manager, aftermarket training for Dana’s Aftermarket Group.
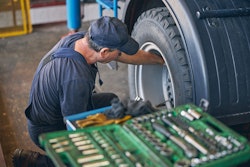
Identify components involved
Universal joints must be removed carefully so as to not damage the end yokes that house them. Linko says in the Class 8 market, most end yokes are full or half-round designs — some wing-bearing style yokes exist in specialty applications such as off-highway, commercial agricultural, mining, and more. In cases where a technician is not immediately familiar with an end yoke type, Linko says tools such as a Spicer yoke ruler can be useful.
Understanding the U-joint within the yoke at the outset is helpful too, though experts acknowledge that’s not always possible until entering the repair.
“You have to do inspection,” says Linko. “It’s important to understand the setup that is in front of you before you start working on it. You don’t want to end up breaking components.”
Once the bearing straps and bolts from the yoke end are removed, the driveline can be separated from the vehicle.
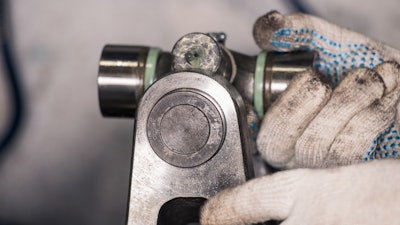
Remove the universal joint
Some U-joint replacement events start here, says Jordan Moe, vice president of service operations at Northwest Drivetrain. A customer may recognize they have an issue within their driveline but not understand the root cause, so they’ll remove the shaft and bring it to a service provider for analysis.
Removing a U-joint from a full-round end yoke begins with the removal of snap rings on the ends of the component. From there, technicians should press one end of U-joint into the yoke until the bearing cup is released, then turn the end yoke 180 degrees to perform the same procedure on the other side. Cummins-Meritor advises technicians use the Tiger Tool U-joint puller to move the part within the end yoke and loosen the cups so the U-joint can become free.
A half-round end yoke offers a simpler removal process with two bearing cups instead of four, though the general process of pressing the U-joint through the yoke to remove the cups and make extraction possible is similar. Once a U-joint is removed, manufacturers say technicians should inspect the yoke dimensions, surfaces and bolt holes for issues and any damaged yoke should also be replaced. However, in cases of only minor fretting, Dana notes a fine-toothed file and/or emery file can be used to remove raised metal.
“It can be easy to damage a yoke when you’re taking [a U-joint] out if you’re not familiar with the job,” says Moe.
 A look at Spicer's aftermarket universal joint product line.Spicer
Identify proper replacement part
Universal joints, like many other truck parts, have good, better, best options in the aftermarket. Manufacturers recommend OE genuine replacement or aftermarket premium products when replacing a U-joint to maintain performance levels and reduce service needs.
“A U-joint may be seen as a cheaper part but it’s also one of the most critical components within a driveline,” says Marco. “If you replace one with another product that wasn’t originally spec’d into the truck, it could cause harm to that system.”
[RELATED: Distributors talk employee retention techniques, e-commerce]
Moe says Northwest Drivetrain offers that advice to customers and also tells them when related parts may be close to the end of their useful life. Some customers take the advice and replace everything at once; others don’t.
“We’ll tell them, ‘This U-joint is the reason you’re here today, but these other parts also have the same number of miles on them’ so they know they won’t last forever,” he says. “We want them to understand what’s ahead, even if they can’t afford to replace both at the same time.”
Install new universal joint
Putting in a new U-joint is essentially a reverse of the extraction method. Once all parts are cleaned and lubricated, the U-joint can be inserted into one yoke bore.
“You usually have to put the U-joint in on an angle at first then you can push it all the way to one side,” says Scott Burrell with PennFleet.
With the U-joint in position, Dana says a bearing cup can be situated over the trunnion that is protruding out of the yoke bore and, using a dead blow hammer, the cup can be tapped into the bore. Next, the yoke should be placed into a press and pushed until the bottom contacts the depth tool, Dana says, before the driveshaft is flipped over and the next cup installed on the other side of the yoke.
 A group of driveline components, including a universal joint, available from Cummins-Meritor.Cummins-Meritor
Once that end is pressed into the position, snap rings can be added on both sides of the U-joint and new retaining straps and bolts can be added to the yoke to lock the U-joint within the unit. A U-joint should face some resistance but should be able to turn within steadily the yoke.
Burrell says if a U-joint fails to move or turns on an uneven axis, it should be disassembled and reinstalled.
“If it is crooked in any way, that truck’s coming back,” he says.
Moe adds Northwest Drivetrain uses a balancer to confirm proper installation and says if a U-joint isn’t perfectly positioned the “balancer won’t be able balance it.”
Lubricate system, inspect repair
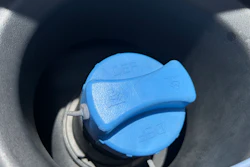
Universal joints that do not come lubricated must be greased before being put into use. Manufacturers are increasingly promoting pre-lubricated components in the aftermarket but acknowledge some customer sectors remain preferential to older styles where greasing is necessary.
[RELATED: The trouble with topping off: Experts caution against mixing coolants]
After lubrication, the driveshaft with the new U-joint can be reinstalled on the vehicle, with the technician being sure to line the driveshaft up with the marks made at the beginning of the repair to ensure identical positioning. The truck can then be removed from the service bay and test driven to ensure a successful repair. If driveline vibration or noise is noted, experts says it’s possible the U-joint was improperly installed, or the component was not the root cause of the truck’s initial service event.
“You should always pay attention and understand why the U-joint needs to be removed. If it has failed, why?” says Marco.