Let’s begin with a scary ending: Poorly installed and neglected wheel ends can lead to maintenance challenges ranging from uneven brake wear to catastrophic failures.
It doesn’t have to be that way. A focus on installation procedures, ongoing visual inspections and a few well-calculated adjustments can lead to much happier endings.
Visual inspections should begin by looking for obvious signs of leaks around the hubcap or seal, suggests Roger Maye, national service manager for ConMet. Some amount of seeping will be normal.
The worries are not limited to escaping oil, either. A lubricant with a milky color will likely be contaminated by unwanted moisture, which can exist if the wheels have been rolling through flooded areas. Some of the unwanted water may even be linked to pressure washers that were aimed at the hubcap or vent.
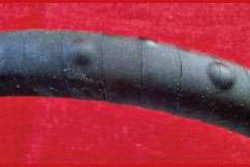
 When inspecting wheel-end components, look for signs of uneven wear on the braking surface of the brake drum.
There also are other visible signs of trouble. While lubricants can be expected to darken with use, a dramatic shift in color or an accompanying burned smell can be a sign of excess heat. If you spot that, it is time to lift the vehicle to check for free and smooth wheel rotations and check for signs of excessive end play that would fall anywhere outside a range of .001 and .005 in.
But some issues may even be hiding in the depths of an oil bath. It’s why Maye likes to stick a magnet through the fill cap to see if it attracts any of the metallic particles that can be traced to peeling or spalling bearings, which can be caused by challenges such as an excessive pre-load.
The volume and condition of the lubricant should be inspected every year or 100,000 miles in a linehaul application and some situations will require more attention than that, he says.
“With use, the oil tends to dissipate, and you wind up with just the thickeners and the additives left and inadequate lubricant coverage on the bearings themselves.”
As important as the lubricant is, however, there are times when the bearings will require a close look of their own.

The bearing cone, which includes taper rollers and a metal or polymer cage, should be rotated slowly to look for signs of trouble like corrosion, metallic debris, pitting or metal flakes.
 Only after the drum is inspected for hairline cracks, hot spots and other problems, should it be installed over the hub.
Any scoring can be a sign of dirt or grit, while a color that shifts from a straw brown to deep purple can be a sign of overheating caused by a lack of lubricant, a poor adjustment or excessive load.
“We’re seeing some issues of bearing cone race rotation in the industry right now with heavy-haul and wide-base tires with two-inch offsets. You want to look at the rear face of the mounting hardware and make sure it’s not damaged from cone race rotation,” Maye adds.
“If you see polishing on the (inside diameter) of the bearing bore, we recommend that the spacer be replaced.”
Bearings, meanwhile, should be checked for scoring that can be caused by excessive preload, spalling at the end of the roller that can be caused by issues like a lack of lubrication or excessive wear at the end of the roller that can be caused by a loose adjustment, SKF notes.
And in every application, both bearings and cones should be replaced at the first sign of any damage, says Leslie Kern, SKF’s product development manager – heavy-duty.
Even if one piece seems to be unscathed, it will have been damaged by contact with its mate.
 The proper tools for removal and installation of wheel-end seals are critical to seal performance.
Installers also should note the first wave of pre-set hub assemblies heading into their shops do not use standard bearings, Kern adds.
“They look to be the same size, but (pre-set bearings are) especially tolerant, and also include a spacer,” she says.
Of course, every wheel assembly presents unique installation challenges. Unitized hubs, for example, can include unique locking systems, and torque values can vary from one manufacturer to the next. It’s one of the reasons why Maye and Kerns both stress the value of using Technology & Maintenance Council Recommended Practice 618.
But no matter which bearings are installed, these vital rolling components also should be kept in their packages until the last-possible minute. Used bearings should be stored in a clean solvent system equipped with a filter.
“Never put the bearings on the bottom of the container,” Kern says of the cleaning systems, referring to the area where sediment and debris tend to collect. And anyone who wants to apply a shot of compressed air also should be careful not to spin the rollers, since the air itself can carry some debris of its own.
Every piece needs to be handled with care. Tossing a bearing cage into a box filled with other hard components can lead to a deformed part.
“Treat the bearings like they’re precious,” she adds. “Once you clean it, you need to protect it until it gets inside the hub.”
When it comes to removing any unwanted rust and corrosion from a spindle, an emery cloth will be the tool of choice, but deeper grooves will need to be filled with a hardening gasket material and then buffed down with the emery cloth.
The seal’s landing area also will need to be clean, while chamfers should be clear of nicks or burrs.
“With aluminum hubs, you don’t want to use metal scrapers (which could damage the hub),” Kern stresses, suggesting a non-metallic scraper will be a better choice.
Actual installations also can benefit from a few tricks of the trade.
When replacing the cup in an aluminum hub, for example, Maye recommends welding a bead around the cup’s face.
“The bead will shrink the cup as it cools. The bearing cup will almost fall out of the hub assembly, and (the bead) keeps you from driving it out,” Maye says. “We have a higher interference fit between the cup and cone on an aluminum hub, and you actually can damage the bearing bore when removing the cup if you just drive it out cold with a punch and a hammer.
“But if you weld a bead around the face, and allow it to cool, you shrink the race and it comes out with very little effort, without potentially damaging the bearing core.”
A lesson in the applied physics of expansion and contraction also can help when re-installing the parts.
Simply chill a new cup in the freezer or with dry ice, and heat the hub in an oven at temperatures of 175°F to 210°F.
“You also can do that with things like boiling water or a steam cleaner,” Maye adds, referring to the heat source.
In contrast, a cast iron hub can be pressed in place at room temperature because there is less of an interference fit or chance to damage the hub.
Once assembled, a .002 in. feeler gauge can be used to ensure the cup is seated in place. Just check between the bottom of the cup and shoulder of the hub to verify that everything is completely seated.
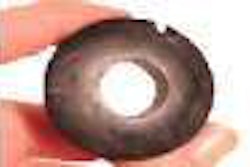
The need to find a perfect fit even extends to the choice of seals, which should be perfectly matched to the wheel assembly. They also should be replaced rather than being re-installed since they can be damaged easily when removed.
As important as a new seal will be, however, it also needs to be installed with the manufacturer’s related tool — and that will never come in the form of a hammer or block of wood. Each tool is designed to apply pressure on a specific area of a particular seal.
When inspecting the many components in a wheel end, brake drums deserve a close look of their own, adds Johnathon Capps, product engineering manager for Webb Wheel Products.
“Look for even wear on the braking surface of the drum. You can use your finger tip and go around, and any sort of uneven wear is indicative either of mis-mount or potentially mis-machining,” he says.
Any sign of cracks through the braking wall will indicate it is time for a replacement, but fine hairline cracks are acceptable. In addition, any heat checks will form and wear away with use.
As rugged as they appear, however, there are limits to the amount of wear a brake drum can tolerate.
“It’s not very much for your standard brake drum,” Capps explains. “It’s typically 120 thousandths over the nominal braking surface diameter. That’s only 60 thousandths — or 1⁄16 in. — per radial side.”
A calibrated pin micrometer can be used to measure the largest diameter of the braking surface — including the grooves that can be caused by the buildup of debris between the drum surface and the lining.
Any sign of hot spots on the braking surface deserve some attention, too, since these locations will become harder than the rest of the braking surface, leading to unwanted vibrations and uneven wear.
“Any time you see any sort of ‘leopard spotting,’ it’s usually indicative of another problem, be it adjustment or drag. It also can potentially lead to cracks and failures,” Capps adds.
As similar as the brake drums may appear, installers also need to be aware of the differences that exist.
“A customer may get a tape measure and figure all the dimensions are the same except for the pilot may be a hundred thousandths off. That hundred thousandths is important. It needs to be the exact same,” he says.
Even storage procedures can make a difference. Rust can form on the surface of a brake drum that has been exposed to the elements, and this can affect the ability to reach proper torque values when it comes time to tighten everything.
Drums stored on their side also can warp, leading to vibrations or brake balance problems, and mounting flanges will crack if dropped from a pallet to the shop floor.
A little extra care obviously will lead to happier endings.